Showing posts with label Pies/Tarts/Galettes. Show all posts

Monday, February 2, 2015

Pumpkin Pie for two | Small batch baking

When it comes to baking, I always try to scale down the recipe. Its because a)it is just the three of us and b)if it goes the wrong way then I dont have to ditch a whole lot of ingredients. That being said, I had always wanted to try my hands on homemade pumpkin pie but something told me that this will not be sold that well in the house. And so I made pumpkin pie for two.

Let me talk about the batter first and then lets move on to the pie itself. The recipe that I have here makes more filling than needed. So I made another batch of the dough and made mini pumpkin pies for pappu's preschool. Moving on to the pie, if you are a lover of spices then pumpkin pie is your piece of cake. Its not that sweet, its not overpowering and the spices kinda tingle your palate. Allow the pie to cool completely and then stick it into the fridge overnight to get neat slices. And as for the decorations, they are totally optional but since I was in the mood I made small leaves and flowers and baked them separately and then stuck them onto the pie.


For the Crust:
All purpose flour - 3/4 cup
Cold butter - 2 tbsp, cut into cubes
Cold vegetable shortening - 2 tbsp, cut into cubes
Salt - 1/4 tsp
Granulated sugar - 1/2 tbsp
Ice cold water - 2 tbsp

For the filling:
Eggs - 1 + 1 egg yolk
Pumpkin puree - 7.5 oz
Whipping cream - 1/4 cup
Light brown sugar - 1/2 cup
Ground cinnamon - 1/2 tsp
Ground ginger - 1/4 tsp
Ground cloves - a pinch (1/16 tsp)
Salt - 1/4 tsp

How I Made it:
Lets make the crust first. Mix flour with salt and sugar. Work the butter and shortening into the flour until it resembles pea sized peas. Add the water by tbsp just enough to bring the dough together. Form a ball, put into a ziploc bag and refrigerate for 30 mins. Preheat your oven to 375 degrees.

In a large bowl whisk together all the pumpkin filling ingredients until well combined. Grease a 6" pie plate with non stick cooking spray and set aside. Roll the dough out on a floured surface, crimp the edges together to make a pretty pattern. And set aside. Pour filling into the prepared pie shell and bake for 30-35 mins or until set, the center might jiggle a little. Cool for 30 minutes on a wire rack. Then, pop it into the fridge overnight.


Slice and serve with some whipped cream!!!

So thats it Folks...
With Love,

Signs off!!!


Interested!!! Click to read more...

Wednesday, May 7, 2014

Mocha Mousse Pie | Dessert for two

Life is all about how you make your decisions. There are those that you love, and there are those that you hate and then there are those that you regret. And that one decision you make can change you and your course of life too. One thing that I have learnt from life is that never ever ask someone else to make that decision for you. Decide for yourself and go for it. Even if something miserable happens you know who has to take accountable for. I have always "put my ball in someone else's court" and there are decisions which I am happy of and there are a hell lot of decisions that I still regret of. I am in another such situation now and I have still haven't made up my mind. But I have been giving a lot of thinking lately. Just wish me luck and I will let you know when things fall in place.

I will talk about this pie in a minute but lets talk about our latest obsession. Its the french silk pie from Baker's square. We are totally insanely obsessed with their pies that its becoming a regular monthly activity. Things had to be taken into hand when the huss was adamant in getting a pie for some i-forgot-what-it-was reason. Since it was just the two of us I scaled down the recipe to a 6-inch pie. You get a taste and you donot have to pump all the excess calories from that of a regular sized pie. Now lets talk pie and all I have is two words for you, "extreme mocha goodness", well not two words!!!

~*What U Need*~
Semi sweet chocolate chips - 3/4 cup
Heavy whipping cream - 1 cup + 1/4 cup
Instant coffee - 1/2 tbsp
Confectioner's sugar - 1/4 cup
Vanilla extract - 1 tsp

For the crumb:
Nila wafers - 1 1/2 cups
Melted butter - 1/4 cup

To decorate
Chocolate syrup, almonds, chopped reese cups

How I Made it:
Process the wafers in the food processor to crumbs. Pour melted butter and pulse few times. Press into a 6-inch pie pan and bake in a preheated oven at 350F for 10-12 mins or till golden brown. Cool completely. Scald the cream till hot. Add the coffee and mix well. Pour over the chocolate and allow to melt for 10 mins. Whisk till smooth. Set aside to cool. Using a stand mixer or electric beater beat the cream to soft peaks. Add the sugar and vanilla and beat to stiff peaks. Set aside 1/4 of the cream for garnishing the pie. Gradually fold the chocolate mixture into the cream. Pour into prepared pie crust. Spread with reserved cream mixture. Garnish as desired. Chill overnight in the refrigerator.

Slice and serve.

So thats it Folks...
With Love,

Signs off!!!

Interested!!! Click to read more...

Tuesday, October 8, 2013

Fresh Strawberry Galette | Strawberry Mini Galette | Strawberry Crostata

The berry season has come to an end and it makes me sad. I have not enjoyed the berries to the fullest as I came here mid-season. However I had my fair share of cherries, blueberries, raspberries and blackberries and not to forget the peaches, plums and nectarines. I had them in juices, milkshakes, smoothies, yogurts and then there were days when I simply popped them as a snack. Only when I saw them fading slowly from the market aisles, did I bother to browse for recipes.

The other day I bought some strawberries and when I was cleaning them I found that they were not that good. Some had gone bad and some were nearing that stage. I wanted to use them all in one go and was thinking of dishes when this galette struck the bell. Galette is nothing but a free form pie. You don't need a pie tin and so it is friendly. Making a galette has always been in my mind and the half-wilting strawberries was the perfect excuse.

Right from the time I started making the galette to the minute I put it into the oven, the kid was going haywire. He was restless every minute and was like a timer going on every minute. Whenever I left the oven unattended, he would be there by my side, pulling my hands to check the status. He wouldn't even let me take pictures, see there his baby hands sneaking to grab a piece. Only after he got a mouthful of this flaky tarty galette, was he under control.

Prep Time: 20 mins; Cooking Time: 30 mins; Serves - 3; Makes - one 6-inch Galette

~*What U Need*~
For the crust
Unbleached all purpose flour - 3/4 cup
Salt - a pinch
Cold unsalted butter - 3-4 tbsp
Yogurt - 2 tbsp, plain or flavored
Ice cold water - 2 tbsp
Lemon juice - 1 tsp
Egg - 2 tbsp, crack open an egg, beat and use 2 tbsp

For the Filling:
Fresh strawberries - 250 gms
Almonds - 1/4 cup
Cornstarch - 1 tbsp
Sugar - 3 tbsp

Egg wash - as desired

How I Made it:
In a bowl, whisk together egg, yogurt, water and lemon juice.

Put the almonds in a ziploc bag and bang with your rolling pin. Take the flour and salt in a largish mixing bowl and combine well. Dice the butter into smaller cubes and put this into the flour.

Mix with a wooden spoon or with your hands till it resembles coarse crumbs. You could do this is in the food processor too. Add the egg mixture into the flour and gather to form a dough. Put this in a ziploc bag and freeze for 20 mins.

Meanwhile clean, hull your strawberries and pat dry. Slice them and set aside. Combine the strawberries with the almonds, cornstarch and sugar. Set aside. Preheat oven to 400F. Line a baking sheet with parchment paper and set aside. Roll the chilled dough on the parchment paper into a 6-inch circle, trimming edges until smooth. Place the strawberry mixture in the middle of the dough leaving some space to fold the dough. Fold over the edges of dough, pleating to make it fit. Brush the sides with egg wash and bake for 30 minutes until puffy and golden brown.


Serve warm out of the oven with some whipped cream!!!

** My Notes:
** I used roasted and salted almonds, u could use slivered almonds too
** I used berry yogurt but you could use plain yogurt too.
** The recipe can be easily double for a 13-inch galette.
** It tastes best on the same day, the bestest when warm out of the oven with some vanilla ice-cream
** Take care to leave enough space when piling on the strawberries. I made the border thin and it started opening up when it was baking. So leave atleast 2-inch gap.

So thats it Folks...
With Love,

Signs off!!!

Interested!!! Click to read more...

Tuesday, July 23, 2013

Chocolate Tart with Eggless Shortcrust Pastry

Life has been getting pretty busy here and so blogging has started taking a backseat. It might take some time to be back to normal and I will update you on the recent happenings once everything takes the right path. Am not doing any blog hopping like before nor am I setting aside time to edit photos, compose and finally put up a post here. But that doesn't mean that I am not cooking. In fact am cooking more and to be specific I have been baking a lot. Since appa is here, I have a guinea pig in hand and that kicks me to bake more. He tastes everything I dish out and its always positive comments that I get and that encourages me to bake more. I will be back with all those recipes and with more zeal. Don't get me wrong, I am not announcing a break but there is going to be some lag here so bear with that and do keep visiting the old posts.

Moving on to this tart, this is what I made for the munchkins monthly birthday. Something sweet, something new and something totally addictive. The smooth, perfectly set chocolate custard with that crunchy melt in the mouth biscuit was a delight to have. "Anything is good if it's made of chocolate ~ Jo Brand" and if you like anything with chocolate then you will surely love this tart. Munchkins had his fair share and I knew he loved it when he came for seconds.

The tart shell was so flaky and just melted with a bite. You could go for some savory filling if you are not into sweet fillings (..which I highly doubt). Lemon curd, caramel with praline or 1/2 a cup of plain nutella are some other ideas.

~*What U need*~
Makes a 4 inch tart
For the Shortcrust Pastry dough:
Flour - 1 cup
Butter - 50g/ 1/4 cup, chopped in cubes
Salt - a pinch(skip if using salted butter)
Sugar - 1 tbsp
Ice cold water - 2-3 tbsp

For the filling:
Semi-sweet chocolate - 1/2 cup
Heavy cream - 1/4 cup
Milk - 2 tbsp
Egg yolk - 1
Salt - a pinch
Sugar - 1 tbsp

How I Made it:
In a mixing bowl add flour, salt, sugar and mix well. Add in the cold butter and rub with your fingers till it forms coarse crumbs. Now add water to form a dough. Cover it with cling wrap and refrigerate for 30 mins. After 30 mins, roll the dough on a lightly floured surface into a circle, about 1/4-inch thick. Carefully lay the dough inside a 9-inch tart pan with a removable bottom. Press the dough into the pan so it fits tightly and then press the edges into the sides of the pan. It is important to press the dough evenly into every nook and corner of the ring, especially the scalloped edges. Shave off the excess with a knife. Put the tart in the refrigerator for 15 minutes to relax. Preheat the oven to 175C. Line the tart with aluminum foil and add dried beans dried beans and bake for 30-35 mins.

To make the filling: Heat the heavy cream and milk in a pot over medium-low flame, until u see bubbles in the sides. Remove from heat, add the chopped chocolate and set aside for 2 mins. Stir till the chocolate has melted and the mixture is smooth. Add the sugar and salt and whisk. Beat the egg yolk in a bowl and slowly add the chocolate mixture. Whisk well. Pour the filling into the cooled tart shell and bake at 170 C for 20 mins or till the surface is non-sticky and glossy.

Slice and Serve with whipped cream!!!

** My Notes:
** Chilling the dough is very important to get that flaky crust.
** Also do not over work the dough.
** You can strain the chocolate-egg mixture to remove lumps.
** You can also add the zest of an orange when heating the cream.
** If you see any bubbles or cracks forming on the surface, take the tart out right away - that means it is beginning to become over baked. Mine got a wee bit overbaked.
** I used the fresh cream that I get at my place, it worked well too.

So thats it Folks...
With Love,

Signs off!!!


Interested!!! Click to read more...

Thursday, December 20, 2012

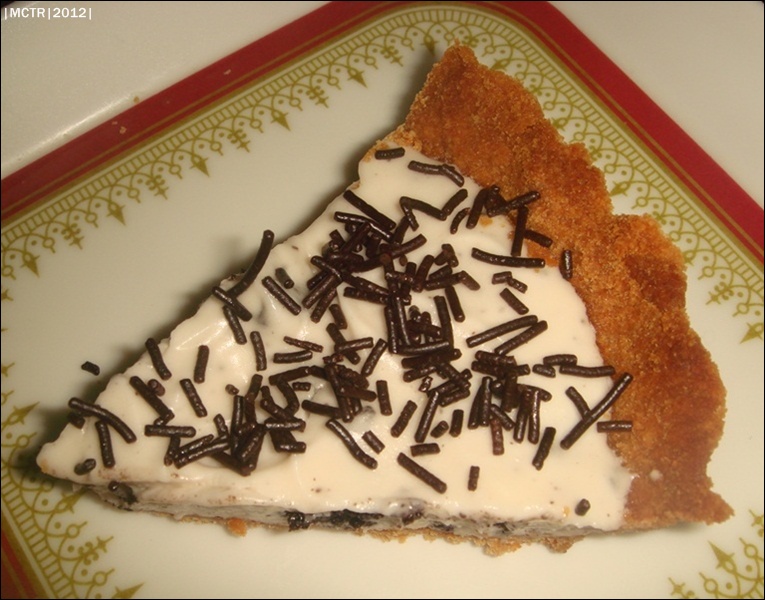
White Chocolate Oreo Cookie Mousse Pie | Easy Dessert Ideas

Ask Mr.A which is his favorite of my cooking, he won't give a second thought in saying "the melt-in-the-mouth chocolate mousse pie". He loves it to the core and whenever I ask him "Do you want me to make anything special for you?", he just asks me to make THE pie. Yes, he calls it "the" pie to give it that extra credit.


A melt in the mouth white chocolate mousse with itsy-bitsy oreo crumbles all together in a (digestive) cookie base

Now that I have made the same pie countless times, I have started experimenting by incorporating new elements and different flavors in the mousse. And that is how I came up with this decadent dessert. I would say it was too sweet and not-my-kind... but it was fit for the huss who is an absolute sweet- tooth mouth. This was made sometime back and was re-visited again to be improved as Peanut Butter Mousse Oreo-Crust Pie which I made for our anniversary. He was delighted with the flavor variation and with him being a PB fan, it has become his favorite now.

Make this easy peesy pie when you are running out of time and when you have friends over. You can make this the day before also and chill it overnight.

~*What U Need*~
For White Chocolate Oreo Cookie Mousse
White chocolate, melted - 1/4 cup
Powdered Sugar - 2 tbsp
Fresh cream - 3/4 + 1/2 cup
Oreo cookies - 5 to 6, chopped

For Cookie Base
Digestive biscuits - 1 packet
Butter - 2 - 3 tbsp

Chocolate vermicelli - to garnish

How I Made it:
Cookie Base:

Blitz the digestive biscuits along with the butter and sugar. Adding the sugar is purely optional. You can do this if you are a complete sweet-tooth. Else skip it. I skipped adding sugar. Press this dough into a tart pan firmly. Bake it for 10 mins or till it turns golden brown.

White Chocolate Oreo Mousse:
Chill the mixer blades and bowl at least for half an hour. Whip 3/4 cup of the cream adding the sugar slowly and increasing the speed gradually till it stands in peaks.
Melt white cooking chocolate using double boiler or in the microwave oven at high for 1 minute checking every 10 seconds. While still warm, add the 1/2 cup cream, and combine well. Add the whipped cream and fold in gently. Add the chopped oreo cookies and fold.
Dump the mousse onto the cookie base and level it. Refrigerate for 2-4 hours.

Slice and Serve!!! When serving, sprinkle chocolate vermicelli on top or crumbled oreo cookies.

So thats it Folks...
With Love,

Signs off!!!

Interested!!! Click to read more...

Tuesday, June 14, 2011

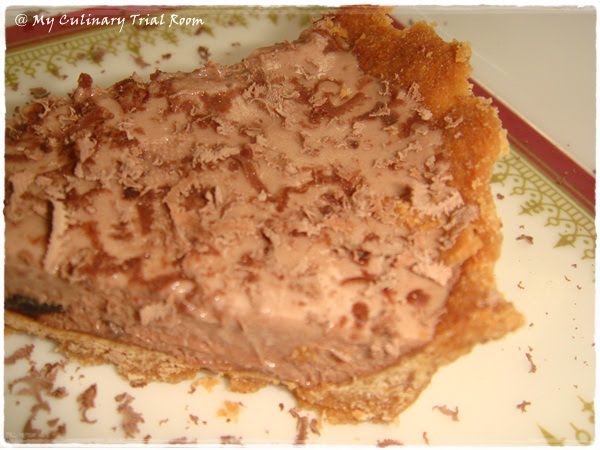
Chocolate Mousse Pie | Less Bake Quickie Recipe & A Birthday Wish

I was inspired to make this pie after reading Thin Mint Pie from My baking addiction. I would say this is one of my keeper recipes. I made this for mom, dad and hubby dears and they all loved it. The crunchy base and the melt-in-d-mouth texture of the mousse make a heavenly combination. Hubby's been asking me to make demanding this to be made atleast once every month. And seriously it takes just minutes to whip the mousse and assemble the pie. The mousse is purely vegan with no addition of eggs and is really quick to make. I adapted the mousse recipe partially from Sanjeev Kapoor’s.

That being said, I have been making this frequently for the past 2 months but was not able to post the recipe due to lack of photos... Just like its texture, it just melts off in my huss's mouth in minutes... The whole pie goes whooosh in seconds... No sharing... So I made this again today for my brother's birthday. Wanted to make Lamingtons but had to pack up for my travel and had a busy schedule at work too. So whipped up something easy yet yummy.

So this post and this pie is for you brother... Feast on the pie with ur eyes as of now and when you come to India will be making this for you...
Happy Birthday to dear you... Missing you around... Dont worry I will make the Lamingtons once am back and will give it as a Belated birthday feast...


Oh yeah regarding the travel I am going on a 4-day vacation to my native... Off from work, work (at home) and tensions. Ofcourse I will be missing blogging and all your wonderful posts but will try to catch up once returned... But you won't be free of my posts... I have scheduled some 2 or 3 posts... So do check them out...

~* What U Need *~


For Chocolate Mousse
Dark chocolate, melted - 1/4 cup

Whipping cream - 3/4 cup
Powdered Sugar - 2 tbsp

Fresh cream - 1/2 cup
Chocolate shavings/Cocoa powder - for garnish


For Cookie Base
Digestive biscuits - 1 packet
Butter - 2 - 3 tbsp

Sugar - 1 tbsp (optional)

How I Made it

Cookie Base:
Blend the digestive biscuits along with the butter and sugar.
Adding the sugar is purely optional. You can do this if you are a complete sweet-tooth. Else skip it. I skipped adding sugar.
Tip the cookie mixture onto a plate. And knead it till it comes together to form a dough.
Press the dough into a tart pan firmly.
Bake it for 10 mins or till it turns golden brown.

Chocolate Mousse:
Chill the mixer blades and bowl at least for half an hour.

Whip the whipping cream adding the sugar slowly and increasing the speed gradually till it stands in peaks.
Melt dark cooking chocolate using double boiler or in the microwave oven at high for 1 minute checking every 10 seconds
While still warm, add the fresh cream, and combine well
Add the whipped cream and fold in gently

Dump the chocolate mousse onto the cookie base and level it. Refrigerate for 4 hours.

Slice and Serve!!! When serving, you can sprinkle chocolate shavings on top.

Note:
Alter the dark chocolate to your taste. Add more if you want the mousse to be rich in chocolate. The above addition yields a milk chocolate kinda flavor.
Adjust sugar to sweet tooth.
Another option is that you can add chocolate chips to the mousse... The second time that I made this I added chocolate chips and this took the dish to another level.


Interested!!! Click to read more...

Sunday, February 6, 2011

Basic Tart topped with Chocolate Ganache

Basic Tart topped with Chocolate Ganache, Rice Crispies, Toasted Walnuts and Marshmallows

I know that I did not do this to perfection but believe me the taste was good. That’s the verdict that I got from my family. Since this was a test recipe, I made with minimal ingredients and that’s why my tart looks like a skeleton. : )
So go ahead for the recipe…

Ingredients:
For the tart:
All purpose flour – 1 ½ cups
White sugar – ¼ cup
Salt – a pinch
Softened butter – 2/3 cup
Large egg – 1 beaten

For the topping:
Semi – sweet Chocolate chips – 1 cup
Rice crispies – as needed
Marshmallows – as needed
Walnuts – a handful

The Making:

Of the Pastry:
Preheat oven to 205 C.
In a bowl, combine flour, sugar and salt. Using pasrty blender / fingers, cut the butter into the flour mixture until mixture resembles like coarse bread crumbs. Using a fork stir in the beaten egg until dough comes together. Form pastry into a ball, cover it with cling wrapper and chill for an hour
Once done, roll pastry out on a lightly floured work surface into a circle slightly larger than the tart pan, place in pan and press onto bottom and edge of pan then firmly roll the rolling pin across the top of the pan to remove the excess pastry. Prick the pastry with fork. Cut out a circle of parchment/waxed paper, place it on the tart pastry and fill it with beans.
Bake pastry for 10 to 12 mins or until golden brown.
Remove the beans before the end of the baking time to allow the pastry to brown.

Of the topping:
Melt the chocolate chips in a double boiler along with 2 tablespoons of butter. Add a tablespoon of heavy cream to give it an extra richness. Blend well.
Toast the walnuts in the oven for 3 mins.

Pour this on the tart pastry. Top with rice crispies, walnuts and marshmallows.

Sending this to Reva's and DK's Announcing A.W.E.D event


Interested!!! Click to read more...
Blogging tips
.