Showing posts with label How to. Show all posts

Sunday, March 9, 2014

Frozen Blueberries | How to freeze blueberries

"When life gives you blueberries, freeze them". Atleast thats what I do. I like freezing my own fruits and vegetables. I have some frozen cherries, raspberries and loads of blueberries right now in my fridge. And I freeze more berries as and when I can. They are handy, totally. I use them in my smoothies instead of ice cubes and it gives a whole new texture and flavor to the drink. And ofcourse in cakes, not to forget them.

Freezing your own berries or fruits or vegetable is easy and damn cheaper too. All you need to watch for is the season. And when its there, grab those berries and chuck them in the freezer. Off seasonal fruits are so expensive and the frozen ones have all those uncalled preservatives added. So why not try freezing your own fruits. The procedure is so simple and easy too.

To use these homemade frozen berries, all you need to do is grab them from the freezer bag and add it to your recipe. You don't need to thaw them cos they will start bleeding as they come to room temperature which you would never want in your cake batter.


~*What U Need*~
Blueberries - as needed
Water
A colander
Kitchen towel
A cookie sheet
Freezer safe bags or containers

How I did it:
Wash blueberries and pat dry with a clean kitchen towel. Remove any damaged berries.

Pour the blueberries onto a cookie sheet in a single layer. This will keep them from freezing together in clumps. Place the tray in the coldest part of your freezer, and leave it there until the berries are completely frozen. Transfer the frozen blueberries to a freezer safe bag and place it in the freezer.


Use in smoothies, cakes or waffles!!!

So thats it Folks...
With Love,

Signs off!!!

Interested!!! Click to read more...

Thursday, October 24, 2013

Homemade Khoya/Mawa/Kova | How to

I am back after an awesome weekend trip to see my brother. Yes the huss took a day off and we planned a trip to SFO away from the dipping WI temperatures. It was chilly there too but good chilly. The chillness cleared off by the noon and then we would pack off to tour the city. I loved the place, it was buzzing with people, filled with awesome food and you have Gucci, Vera Wang and Ghiradelli. I was merely ogling at all the high-end shops in Union Square for 2 hours. And then my brother whisked us away to the Whaft were I could do some actual shopping. I bought fridge magnets, loads of chocolates and even an artisan sourdough bread at the Boudin bakery which I travel-packed and bought it all the way to WI. We made sandwiches for our dinner yesterday night and I still have some leftovers(BTW its gonna be PB&J on sourdough for breakfast tomorrow). In short, we hanged out, we chilled out, we ate out and we talked a lot. It was quality time with my brother after 4 long years and I enjoyed every minute of it.

Now that we are back, life is slowly moving back to normal(...but mentally I am not). There are loads of winter-shopping to be done and all I have is a carton of milk that I saved before the vacation. I so have to go grocery shopping if I need to put lunch on our plates tomorrow. I wanted to take a break from blogging too cos this weekend is going to be pretty busy too. The huss's friend is coming over to stay with us for the weekend and u know how it is gonna be. And then when I sat down to while away, my mind was buzzing with thoughts and the only way that I could relax seemed to be blogging and so I started going through my drafts.

Since it is Diwali time, I thought that I could share this simple 'how to' to break the blogging lag. I made this Khoya before the SFO trip and then I made Khoya burfi the next day. It was super delicious filled with the flavor of fresh cardamom and just like the store bought ones. All the labor and patience that went into making this 1 cup of khoya was worth everything cos the burfi was fresh filled with homemade goodness. As I said making khoya needs 100% attention and patience and not leaving the pan side even for a minute but nothing can beat the freshness of anything homemade. Off we go to the step by step tutorial.

Prep Time: 0 mins; Cooking time: 30-45 mins; Makes: 1 cup

~*What U Need*~
Full fat whole milk - 4 cups/ 1 litre

How I Made it:
Take a heavy bottomed wide vessel or a non stick pan. Bring the milk to a boil. Once the milk boils, reduce the flame to medium and cook till it thickens. Scrap the sides at times.

When the milk thickens, reduce the flame to low. Keep stirring until the milk completely thickens and forms khoya. Remove it from the flame, allow to cool and store.


Store in an airtight container.

** My Notes:
** Use full fat milk to get a better result.
** Khoya thickens as it cools.
** Keep scraping down the sides frequently.
** You can remove the khoya from the flame depending on how much moisture content you need.

So thats it Folks...
With Love,

Signs off!!!

Interested!!! Click to read more...

Tuesday, October 15, 2013

Homemade a.k.a Desi Ghee | How to make ghee at home

It is time for the festival of lights and Diwali snacks and sweets have started cropping up in most of the Indian blogs. I have planned my share too and since the huss is a big fan of ghee sweets, I might be posting just sweets this time... But lets see, how its gonna be. I thought that I could start off with the basics first. Like Mawa/khoya and ghee to name few. We all know that ghee is a quintessential ingredient of most of the Indian sweets&cooking and we all know that ghee costs quite a bomb here in the US. That left me with no other option than to make it at home.

Back in India, amma makes ghee from store bought unsalted butter like aavin. Note the point, it has always been amma who makes ghee for me. Even the thought of trying it once had never crossed my mind. Why should it, when I had amma with me. Ever since kutty was born, we have been making ghee at home. Before coming to the US, one thing that I asked my huss to buy from the Indian store was ghee cos I knew that I would need it atleast for kutty's sake. But when he told me the cost, I knew that that would be the last time I buy store-bought ghee.

Making ghee at home is a breeze but it needs patience and attention. I burnt my first batch a wee bit and so the second time started with a test batch to get the hang of it. Making ghee at home fills your house with a sweet smell which you will surely love and finally making ghee at home is way better than buying it from the store a) it is cheaper and b) you know what you are putting into the kadai.

After making the ghee, you will be leftover with the milk solids, you could either mix it with rice and have it with dhal or you could make laddoos out of the lot. Check out my next post on how to use it.

~*What U Need*~
Unsalted Butter - 1 pound or as needed
Buttermilk - few drops
Muslin cloth
Heavy bottomed vessel

How I Made it:
Take a heavy bottomed vessel, which is large and broad preferably. Heat the butter in the vessel in medium flame. Once the butter melts completely, you will see a pale yellow foam forming on top. As you heat more, the foam will split and the butter will start boiling with a sizzling sound.

After heating more the sound will stop and the butter will start to form bubbles. Now sprinkle a few drops of buttermilk. This will help the milk solids to settle. At this point you will be able to see a clear liquid with the brown solids settling down. Once it cools down, sieve the ghee through a fine muslin cloth into an airtight container. Click on the picture to have a better view.


Store in an airtight container!!!

** My Notes:
** Since this was my first time, I first ran a test batch and hence used a small vessel. But if you are using a huge amount use a big vessel
** You can also add curry leave and drumstick leaves to make it more flavorful
** Amma always makes a small batch for my kid in which she adds a pinch of cumin seeds and crushed peppercorns.

So thats it Folks...
With Love,

Signs off!!!

Interested!!! Click to read more...

Thursday, April 4, 2013

How to freeze green peas | How to make frozen peas at home

It all started 2 years back when I got a pack of store-bought frozen peas. One whiff after opening the packet and it went straight to the bin. There was an undescribable awkward smell coming out of the pack which I couldn't stand at all and that was the end of my frozen-product-shopping. Not that I buy lots of frozen products. I once bought a chicken salami to have on our morning sandwiches but the high sodium content put me off and I have never tried frozen products since then, the frozen peas being the only exception.

After that incident, I have been looking forward to the green peas season and when it comes I stock my pantry with kgs of peas. And then its peas season for us. I pair it with aloo or gobi or make peas masala for rotis, simple yet flavor and nutrition packed recipes. I put them in tupperware boxes and freeze them but they dont last for more than two weeks, they sprout and then it had to be used. That is when I started browsing for recipes on how to store peas and then I came across this method of blanching and storing. Its simple and she said she stores upto 8 kgs of peas this way. Sounded quite catchy and so I followed her recipe. I did this when the peas season was in full bloom, when they were so cheap, sometime in January and I still have nearly 2 kgs of peas safe and sound in my freezer. The above pic was taken on the day of blanching and storing and the others recently. They shrink but don't be worried, thats how they are. I know this post is late for the peas season but do take a note and try it next year.
Oh and I had to mention, how my kid helped me with the de-seeding from the pods. He enjoyed it totally and you could see him sitting in middle of the pods, fully covered with pea-skins whenever I sat with my haul of the day. And so it makes a great kids-activity too :P

~*What U Need*~
Green Peas - 1/2 kg
Ziplock pouches

How I Made it:
Remove the peas from the pod, rinse and set aside. Boil water in a big pan until it comes to a rolling boil. Add the peas to the water. Initially it will sink to the bottom.

After 2 mins it will start floating to the top. Remove the peas immediately with a slotted spoon. Allow to dry in a clean towel till there is no moisture. Store it in a ziplock bag. fFreeze it. Whenever needed take the required amount and thaw it. Use as desired.

How to thaw frozen peas:
Take the desired amount of frozen peas, soak it in room temperature water and use after it comes to room temperature. Rinse before using.

Homemade frozen peas ready to be stored.

** My Notes:
** The above method is known as blanching. This way it gives more shelf life.
** Remove the peas as soon as they move to the top. Donot overcook.
** You can easily double the recipe and make larger batches.

So thats it Folks...
With Love,

Signs off!!!

Interested!!! Click to read more...

Friday, December 7, 2012

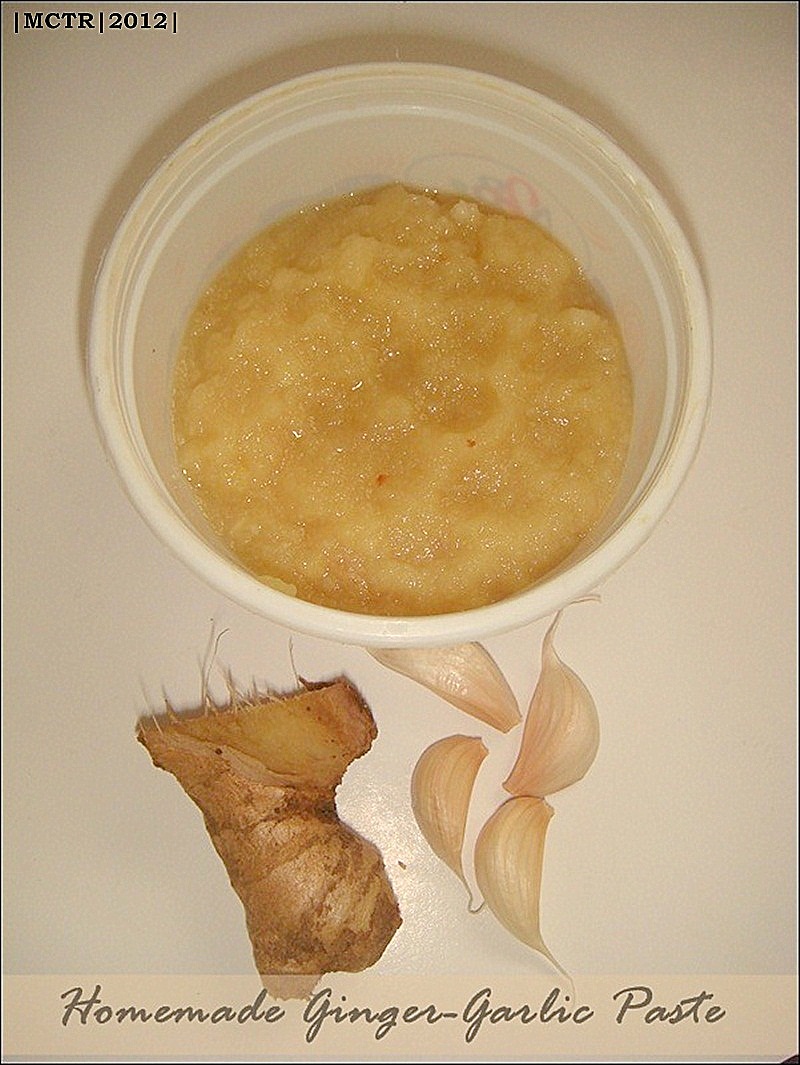
Homemade Ginger-Garlic Paste | Back to kitchen basics

Its been a long time since I updated my 'How to' index. And when I browsed it, I found that I am missing the most basic Ginger garlic paste. It is a very essential part of any non-vegetarian kitchen. The flavoring that it adds to biryani can never be beaten and when it is homemade and fresh, the final dish is spot on with loads of flavors. How many of you buy ginger-garlic paste from the stores??? I am not one of them. I make it at home and store this in an air-tight container when I find free time in the weekends. It has a good shelf life and I use mine within one or two weeks but it can last till 1 month.

Everyone has their own version of making GG paste.Here is my version. I add some salt to the paste and hence keep an eye on the dishes I make for salt. You can skip adding salt too.

~*What U Need*~
Ginger - 1 cup
Garlic - 1 cup
Water - 1 tsp
Oil - 1 tsp
Salt - 1/8 tsp

How I Made it:
Peel the skin off ginger and garlic and chop them roughly. Blend this with salt, water and oil till you get a smooth paste. Store in an airtight container. Refrigerate it.

Sending this to EP series held at SpiceNFlavors originally started by Julie.


So thats it Folks...
With Love,

Signs off!!!

Interested!!! Click to read more...

Thursday, December 6, 2012

Pumpkin Puree | how to make pumpkin puree at home

Next halloween, people in the US think twice before you go to grab a can of pumpkin puree and Indian bloggers don't drool over all the Halloween pumpkin specials floating around the food blogsophere. Here is the recipe to stop all that drooling ~ a homemade pumpkin puree recipe. Imagine all the goodies you can make with this. Give a whole new makeover to your morning breakfast with freshly baked pumpkin bread or wholewheat pumpkin pancakes. Give a twist to your regular brownies and make some pumpkin blondies. Oh, ideas seem to be flowing non-stop and all I am having is 2 1/2 cups of Pumpkin puree.

I made this during the season of Halloween and for the next few weekends my whole house was smelling of freshly baked pumpkin goodies. Oh bet me, nothing can beat that aroma. We have been having whole wheat pumpkin squares with cinnamon sour cream dip and wholewheat pumpkin pancakes with honey for breakfast and white chocolate chunks pumpkin blondies for dessert... A whole new breakfast menu and the huss was totally satisfied to see something different on his breakfast plate.

~*What U Need*~
Makes - 2 1/2 cups approx

Pumpkin - 1, smaller variety
Oil - to brush

How I Made it:
Cut the pumpkin into half and scoop out the seeds. Do not throw away the seeds. They can be roasted. Cut the pumpkin halves as shown below and rub oil on their skin.

Place the pumpkin cut side down on a baking sheet and bake in a preheated oven at 200C for 30-35 mins. When done, a fork or skewer inserted will pass through smoothly. Remove, allow to cool and when able to handle, scoop out the flesh. Take this in a blender and blend till smooth.

If too chunky add a few tbsp of water. Strain this to remove fibres and store till use.

Homemade pumpkin puree ready!!!

So thats it Folks...
With Love,

Signs off!!!

Interested!!! Click to read more...

Sunday, July 1, 2012

Homemade Breadcrumbs

I always make my own breadcrumbs at home. It can be made in a jiffy and it is a great way to use leftover stale bread slices. I was not planning to do a post on breadcrumbs until I came across a couple during one of my visits to Nilgris supermarket. They were loading their basket with all sorts of frozen foods and ready to eat food packets. Sounds normal to everyone!!! but I am one who is always against these. Why incorporate all sorts of chemicals into your body when you can make them at home cheap and fresh. But I was amazed when the woman took a packet of breadcrumbs from the shelves and dropped it into her basket. Actually I wanted to walk up to her and tell her the recipe to make this @ home but I knew that it would make an embarrassing moment.
So now you would know the reason behind this simple post. I wanted to let people who read my blog to know how simple and easy this is to make.

~*What U Need*~
Left over wheat / white Bread - 4 to 5 slices

How I Made it:

Preheat oven to 180 deg C for 10mins, place the bread slices in the tray and toast for 5-7 mins until the bread slices turn golden brown / microwave in high for 3 mins or till crisp / toast in a pan till brown on both sides. Break the toasted bread slices roughly into pieces and pulse it in mixie as fine as possible. Store in airtight container and refrigerate it.

So thats it Folks...
With Love,

Signs off!!!

Interested!!! Click to read more...

Tuesday, March 6, 2012

Candied Walnuts ~for salads / snacks

Walnuts are a rich source of heart-healthy monounsaturated fats and an excellent source of those hard to find omega-3 fatty acids. Including them in your daily diet, is one of the healthiest way of eating. I like adding them in my salads and they make wonders when added to a simple apple salad. This way of adding Candied walnuts gives that extra crunch and sweetness when added to salads. The below mentioned quantity will make for one serving for a single person. I tried this with a small amount as this was my first time and used honey but you can also use sugar as an alternative.

~*What U Need*~
Walnuts - a handful
Honey - 1/2 tbsp
Salted butter - 1/4 tsp

How I Made it:
In a non-stick pan, add the walnuts and toast them for a minute or so. Remove the walnuts and add butter, allow to melt. Now add in the walnuts and add the honey. Keep stirring through the whole process.

The honey-butter mixture will start bubbling and will start coating the nuts. Switch off the flame, give a good stir and then allow to cool completely.

Add to your favorite salads or you can even have it as a munch on snack. Make in large batches and store in air tight containers.

So thats it Folks...
With Love,

Signs off!!!

Interested!!! Click to read more...

Wednesday, February 29, 2012

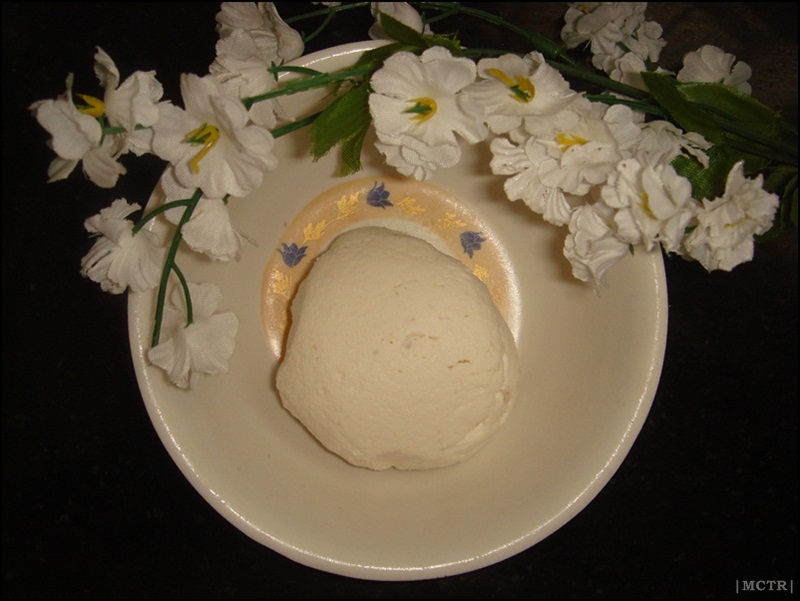
Mascarpone Cheese.. I made it @ home

I always wanted to try the heavenly Tiramisu. I haven't had the perfectly made Tiramisu and hence whenever I have one, I couldn't compare it back to anything but deep down I knew that something was missing. It just didn't seem complete. Everyone knows that it is made of ladyfingers dipped in coffee, layered with a whipped mixture of egg yolks and mascarpone, and flavored with liquor and cocoa. Chennai misses the ladyfingers and mascarpone to make the traditional dessert. But then the tiramisu fever took to me so much that I wanted to make some at home. I was open-mouthed when I saw that 100 gm of mascarpone cost nearly 250 rs. God, that is one whooping amount. So I sat to browse for homemade recipes and tried with a smaller batch. It came out too well. Next in queue is the batch for Tiramisu.

~*What U Need*~
Whipping / fresh cream - 1 cup (I used Amul fresh cream)
Freshly squeezed lemon juice - 1/2 tbsp

How I Made it:
Bring 1 inch of water to a boil in a wide pan. Reduce the heat to medium-low so the water is barely simmering. Pour the cream into another pan, place this above the skillet. Heat the cream till you see small bubbles by the side of the cream. Keep stirring the whole time.Add the lemon juice and continue heating the mixture, stirring gently, until the cream curdles. Do not expect the same action as you see when you make paneer. It will become thicker and cover a back of your wooden spoon thickly.Remove the bowl from the water and let cool for about 20 minutes. Meanwhile, line a sieve with muslin cloth and set it over a bowl. Transfer the mixture into this. Do not squeeze.
Once cooled completely, cover with plastic wrap and refrigerate overnight or up to 24hours.

Use as desired.

So thats it Folks...
With Love,

Signs off!!!

Interested!!! Click to read more...
Blogging tips
.